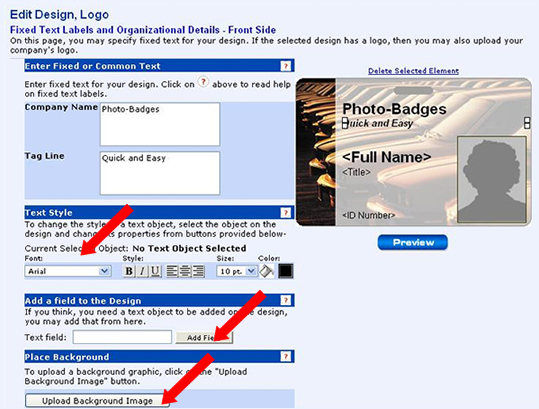
If you want to edit a preexisting text field, select it by clicking on it with your mouse. Then, you can change the font size, orientation, color. etc using the "Text Style" tools to the left. Later, when you input information into that field, the information will appear according to your specifications. You can also add new text fields to the template. Type in a name for the field and click "Add Field." Remember, the name of the field will not appear on your final badge, it will be replaced by the information you input later.
Certain card designs contain fixed or common text. Fixed text is text that will appear on every card made with that template. For example, if you are making ID-badges for an entire company, you might want your company’s name to appear on all the badges. As a result, there are a number of badge templates that have a fixed text field for "company name." By entering your company’s name into a fixed text field, you save yourself the trouble of having to reenter it every time you make a badge for someone new.